Track AI Limits in Your Mac Menu BarЛимиты AI в менюбаре Mac
“Max, why is Claude blocked again?”: how to track the limits of three subscriptions in your Mac menu bar
My wife came to me once again with the same question: “Max, why is Claude blocked again, and when will the limits reset?”
I realized I was tired of checking and explaining it manually every time, so I decided to install the same utility I use on her Mac. Before doing that, I thought it would be better to write a step-by-step guide for everyone—so she could set it up herself in two minutes, and you could save a ton of time and frustration too.
What CodexBar can do
When you’re actively coding or working with AI agents, it’s impossible to keep the limits of three or four subscriptions in your head. In my case, that’s Claude Pro, OpenAI / Codex, and Google Gemini / Antigravity.
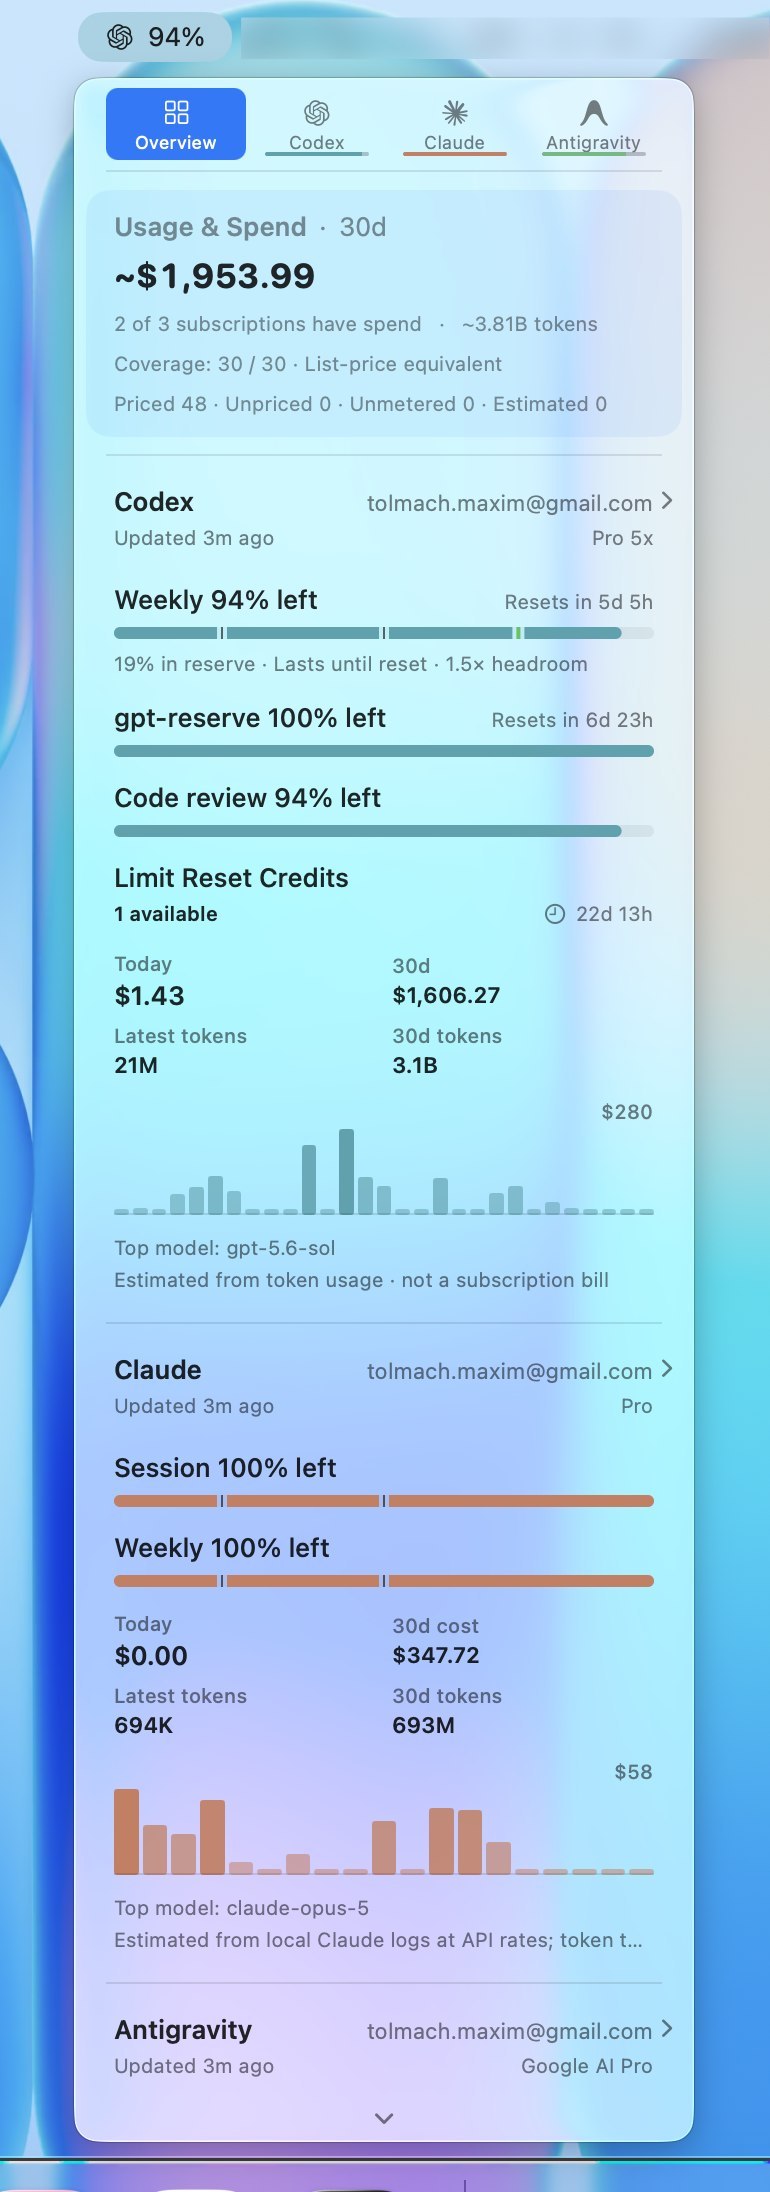
CodexBar solves this once and for all: it sits in the macOS menu bar and shows real-time usage bars for each subscription, along with a countdown until the limits reset. It also displays free resets, server status, and much more.
Why it’s great: • Open source—free and constantly updated; • Supports as many as 69 providers, not just the major ones; • Uses very few resources and doesn’t lag; • Includes macOS widgets.
It supports 69 providers, from leading LLMs to Chinese models, local servers, and API keys.
Native WidgetKit widgets for the macOS desktop show token usage charts.
⚙️ Step-by-step installation guide (1–2–3):
1️⃣ Install it on your Mac: The fastest way is to ask an agent to install it:
Install and launch https://github.com/steipete/CodexBar
- Or download the ready-made .dmg from the official website, codexbar.app;
- Or install it through Homebrew in Terminal: brew install —cask codexbar
2️⃣ Choose your providers: Menu bar icon ➔ Settings ➔ Providers ➔ check the services you use, such as Claude, OpenAI, Gemini, Cursor, and others. Sign-in works natively through OAuth or browser cookies. You may need to enter your password several times and select “Always Allow.”
3️⃣ Done! Now, while you’re working, you can see which model to load up right now and which one to save for more complex tasks.
«Макс, почему Claude опять заблокировался?»: как отслеживать лимиты трёх подписок в менюбаре Mac
Жена в очередной раз пришла с вопросом: «Макс, почему Claude опять заблокировался и когда сбросятся лимиты?»
Я понял, что устал каждый раз проверять и объяснять это вручную, и решил поставить ей на Mac ту же утилиту, которой пользуюсь сам. А прежде чем ставить, подумал, что правильнее сразу написать пошаговую инструкцию для всех — чтобы и она сама настроила всё за две минуты, и вы сэкономили кучу времени и нервов.
Что умеет CodexBar
Когда вы активно пишете код или работаете с AI-агентами, держать в голове лимиты трёх-четырёх подписок невозможно. У меня это Claude Pro, OpenAI / Codex и Google Gemini / Antigravity.
Утилита CodexBar решает это раз и навсегда: она закрепляется в верхнем трее — менюбаре macOS — и в реальном времени показывает полоски заполнения лимитов по каждой подписке и обратный отсчёт до их сброса. А ещё — бесплатные сбросы, состояние серверов и многое другое.
Почему она топ: • Open source — бесплатная и постоянно обновляется; • Поддерживает аж 69 провайдеров, а не только основных; • Мало ест ресурсов и не лагает; • Есть виджеты для macOS.
Поддерживает 69 провайдеров: от топовых LLM до китайских моделей, локальных серверов и API-ключей.
Нативные виджеты WidgetKit для рабочего стола macOS показывают графики расхода токенов.
⚙️ Пошаговая инструкция по установке (1–2–3):
1️⃣ Ставим на Mac: Самый быстрый способ — попросить агента установить:
Установи и запусти https://github.com/steipete/CodexBar
- Либо скачайте готовый .dmg с официального сайта codexbar.app;
- Либо установите через Homebrew в Терминале: brew install —cask codexbar
2️⃣ Выбираем своих провайдеров: Иконка в трее ➔ Settings ➔ Providers ➔ отмечаем галочками сервисы, которыми вы пользуетесь: Claude, OpenAI, Gemini, Cursor и другие. Вход происходит нативно через OAuth или браузерные куки. Нужно будет несколько раз ввести пароль и выбрать «Always Allow».
3️⃣ Готово! Теперь прямо во время работы видно, какую модель нагружать сейчас, а какую поберечь для сложных задач.